Primeros pasos con IASO#
Una guía para la primera configuración básica.
Esta guía está dirigida a los administradores de cuenta que configuran una nueva cuenta SaaS de IASO por primera vez. Cubre la suscripción a un plan, el inicio de sesión, la configuración de sus datos geográficos, la creación de su primer formulario de recolección de datos y la conexión de la aplicación móvil.
1. Suscribirse a IASO#
Si aún no se ha suscrito, vaya a openiaso.com/pricing y elija un plan. Si todavía no está seguro, puede comenzar con una prueba gratuita para probar el producto.
Luego recibirá un correo electrónico con las instrucciones para crear su cuenta.
2. Conectarse a su cuenta#
Vaya a app.openiaso.com.
Introduzca sus credenciales y haga clic en "Login".
3. Configurar sus datos geográficos#
Sus datos geográficos aparecen en el menú "Org Units" (Unidades Organizacionales). Está vacío por defecto en una cuenta nueva. Puede configurarlo manualmente, o importando un archivo geopackage (un formato de archivo estándar para datos de límites geográficos).
Configuración manual
- Vaya a "Org Units" > "Configuration" > "Organisation unit type" (Tipo de Unidad Organizacional)
- Cree los tipos de Unidad Organizacional que correspondan a los niveles geográficos de sus datos (por ejemplo, país, región, distrito, centro de salud)
- Consulte la guía de tipos de Unidad Organizacional para más detalles
Importar un geopackage
- Vaya a "Admin" > "Data sources list" (Lista de fuentes de datos) > "Create"
- Nombre su fuente de datos y asígnela a uno o varios proyectos
- Su archivo geopackage debe seguir este formato: github.com/BLSQ/iaso
4. Crear sus formularios de recolección de datos#
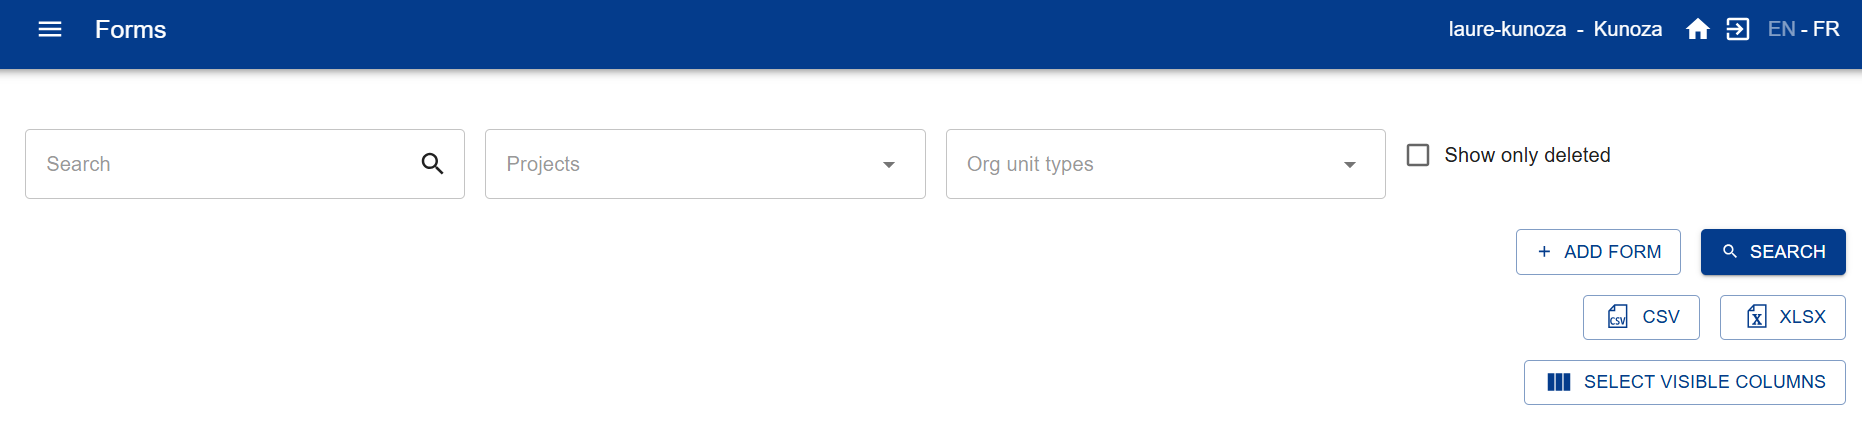
Vaya al menú "Forms" (Formularios). Puede crear un formulario de dos maneras:
Opción A — Generar un formulario con Form AI
- Vaya a "Forms" > "Form AI"
- Describa el formulario que desea en una instrucción: enumere las preguntas que necesita, especifique si cada una debe ser una pregunta abierta o cerrada con opciones predefinidas, y mencione cualquier lógica de salto.
- IASO genera un formulario que puede previsualizar y ajustar en el panel derecho. Guárdelo una vez que esté satisfecho con el resultado.
Opción B — Importar un formulario XLS existente
- Vaya a "Forms" > "Form list" > "Add form"
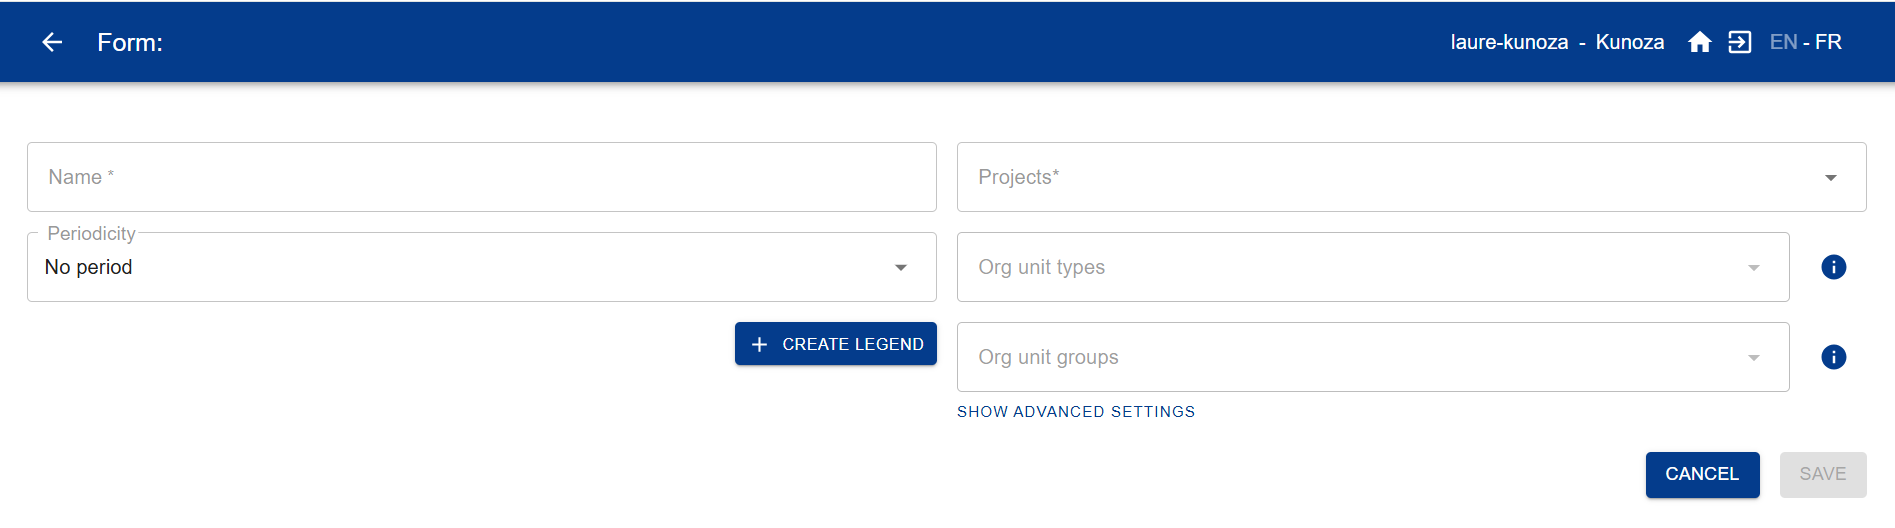
Luego complete los campos:
- Nombre del formulario (obligatorio)
- Proyecto (obligatorio)
- Tipo de Unidad Organizacional (recomendado)
- Grupo de Unidad Organizacional (solo si es relevante, de lo contrario déjelo en blanco)
- Período (solo si es relevante, de lo contrario déjelo en blanco)
5. Descargar la aplicación móvil de IASO#
Obtenga la aplicación móvil de IASO en Google Play Store: play.google.com
6. Escanear el código QR y comenzar#
En la aplicación web de IASO, vaya a "Projects" (Proyectos). Asegúrese de que los indicadores de funcionalidad necesarios estén activados para su proyecto. Luego, haga clic en el código QR de su proyecto. Escanéelo desde la aplicación móvil para finalizar la configuración.